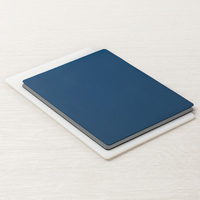
I am finally able to shoot this video. Yes, I know it is Friday, but with all the construction going on at my house it has been anything but quiet. I knew you didn’t want to hear the pounding. So today we are looking at the wonderful Embossing Mat that turns your dies into embossing. It is so simple that anyone can do it. In fact, I have found an easier way to do it. So join me for this video. Then make sure you are a subscriber to my newsletter for an actual project.
I am showing you two ways to use the Stampin’ Up! Embossing Mat. One way allows to see what you are embossing. Now you can use your dies two ways and stretch your creative.
Original Way from Stampin; Up! Starting with your bottom and work up.
- platform
- clear plate
- paper
- die
- gray foam
- embossing plate
New Way. Allows you to see the process and ensure your work is positioned correctly.
- platform
- embossing plate
- gray foam
- paper
- die
- clear plate
Make sure you subscribe to my newsletter to get a completed project with this technique. Now that you have seen how easy to use, it is time to order your own Stampin’ Up! Embossing Mat. Just click here for my online store and you will be stretching dies in their usage. https://www.stampinup.com/ecweb/search/Embossing%20Mat
Quick Links
DBWS http://www.stampinup.net/esuite/home/pinkrose/events
Need to order Online Store https://www.stampinup.com/ecweb/default.aspx
For Free Catalog https://www.stampinpinkrose.com/catalog-re
Join my team http://www.stampinup.net/esuite/home/pinkrose/jointhefun
Questions http://pamela@stampinpinkrose.com
Pinterest https://www.pinterest.com/stampinpinkrose


I’m not sure what is the embossing plate? I have the grey mat what do you use the blue mat for? thanks