Stampin’ Up! has perfect timing. With Jurassic back on the screen and replays on time television, I can’t think of a better time for a dinosaur stamp. So here is No Bones about it. I have created three different cards. One I am holding for July swap. So you will see it the end of July, but here is two of the cards. I have my favorite, but you decide and let me know.
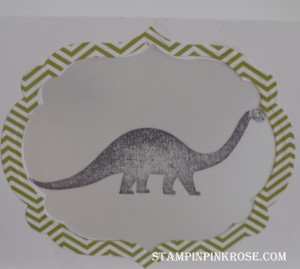
The first card is using Brontosaur with the Vellum. I used the Label Collection, but you could use the Deco Labels. It will work just fine. The size I used was 4 1/4″ across. Don’t forget to request the FREE size cheat sheet when sign up for emails.
- Cut Whisper White Cardstock 5 1/2″ x 8 1/2″ and fold at 4 1/4″
- Cut the frame out your choice of SU Designer Paper. You will need to use the next smaller with it to get the frame.
- Using the smaller size cut out with the Whisper White cardstock you have folded.
- Next cut a piece of Vellum and stamp with the dinosaur
- Adhere to the back
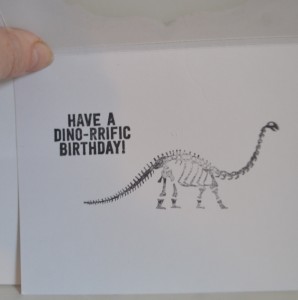
- Line up the matching bones stamp for the inside of the card
- Stamp the birthday greeting above and to the left of the your bones stamped image
Inside
Card #2
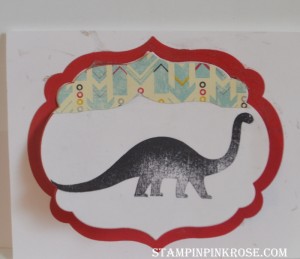
- I used the same frame as in the previous card. This time you do not cut the base of the card. So cut the largest frame out and glue on your card base. You don’t need to worry about the center being cut out.
- Cut 2 of next smaller out in white cardstock and another in a coordinating print paper.
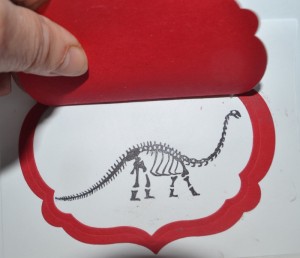
- Stamp the bones on one of it and glue to the larger frame you have cut out.
- Stamp the dinosaur on the other one.
- Cut about an 1″ across on the print paper and glue to the top of the dinosaur image one. Save the bottom part for something else. Glue on.
- Create a fold at the bottom of the printed paper.
- Using two sided sticky tape on the backside of the printed paper.
- You now have flap card
Inside
Note: I did an extra on the back fold part with colored paper. You don’t need to do this. I was playing with the design.
Let me know which card you prefer.


