That Special Day is Almost Here…

Do you know what day is almost here?  Mother’s Day, of course!  A day mother’s treasure everywhere because it is time with their child. So share your thoughts with the one who has done so much.

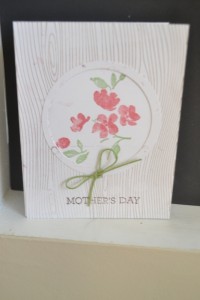
Here is the perfect card for Mother’s Day.  It is done as a circle like porthole which you can look in.  My porthole has flowers that will make her smile.

April 27 2015 002

The card base is done in Whisper White and another piece of Whisper White is cut 4 1/4″ x 5 1/2″.  I stamped the second piece with the Stampin’ Up! Wood Grain Stamp in Chocolate Chip. You could use Early Espresso.  Next I cut a 2 1/2″ circle with my framelits and cut again with Whisper White.  I marked with pencil the placement of the Woodgrain paper so that I could stamp.  Using Stampin’ Up! Painted Petals, I stamped the flowers.  My color choice was Wild Wasabi and Melon Mambo. Now all you need to do is glue the Wood grain paper onto the base and place white circle ring part on top of it. Add a bow and the word Mother’s Day with the stamp (Crazy About You).  See supply list below.  I used some no Stampin’ Up! product for the ribbon.

Built for Free Using: My Stampin Blog

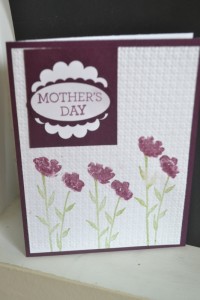
Here is another Mother’s Day card.  The instructions are available in the PDF section of the VIP Group.  Remember this group is FREE.  All you need to do is sign up under VIP.

Bedded Embossed Technique Card 001


Please, Leave A Comment

Pamela Sadler Signature

Quick and Colorful Flower

It is time for a new card with spring in full bloom and I’m thinking flowers.  Okay, maybe one.  I am still keeping it simply.  We all have too much to do. ..  yardwork and another Bridal shower.  So help is on its way.

April 27 2015 004

This card would be perfect for Mother’s Day, Birthday, Thank You, Thinking of You, or Get Well.

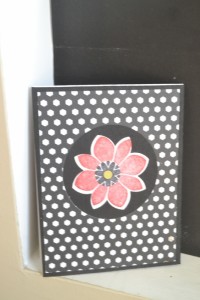
The base of the card is card in Whisper White at 4 1/4″ x 11″ and folded at the 5 1/2″.  Don’t forget to use your bone folder for a perfect crease! Start by covering your base with a 4 1/4 x 5 1/2″ piece of black cardstock. Then  the designer paper  at 4″ x 5 1/4″. The paper is the Stampin’ Up! Designer series paper “Black to Black.”  I just love that paper and unfortunately it is retiring.  Notice this card opens differently, but I like the change.  DON’T ATTACH  till you cut the circles.

I used the Circle Framelits and the size circle is 3 3/16″ is the smallest and the next size up is the one I used for body.   So what you are going to do is place the largest on your paper and the smallest inside it. This is using the designer paper.  Then cut out with your Big Shot.  The flower is stamped from Petal Potpourri and punch out using the Flower Medallion Punch.   I stamped and punched out the center piece with 3/4″ circle punch. Notice I colored the small circle in Crushed Curry.  Glue on the flower in the center.

For assembly glue the black cardstock down and then add the dotted paper (designer paper).  Followed by your flower. Your all done!

Remember notice:  Working with framelits/thinlits gets a lot easier if you use my size sheet.  This has all of the current framelits/thinlits.  I will be referencing a lot in my directions.  This is free when you sign up for my emails.  You can step it up further my going the VIP Group and sign up there because you will have access to my PDF.  This all FREE!

Built for Free Using: My Stampin Blog


Please, Leave A Comment

Pamela Sadler Signature