Blue Bird Visiting

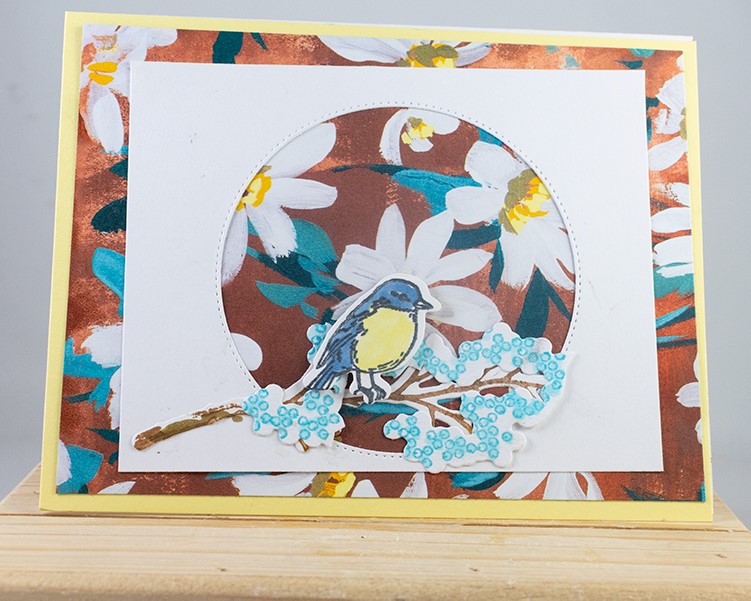
One of my favorite Designer Series Papers is Fresh as a Daisy. I don’t know if it is all the colors or versatility of the paper. Notice I chose no greeting as I was not sure what I needed.  This will be a great birthday card or a thinking of you card. It was certainly a cheery one with a Blue Bird on the branch.

By the way, I had a chance to review the new Spring Catalog coming in January Sale-a-bration products and I have placed an order.  Also, I found some Exclusive products that I wanted. So I will be thrilled to have some new products to work with. So don’t forget the Exclusive items that Stampin’ Up! has listed.

Stamp:

Colors:

Ink: 

  • Memento Black
  • Crumb Cake
  • Boho Blue

Blends:

  • Tahitian Tide
  • Lemon Lolly
  • Boho Blue

Paper:

  • Basic White 5 1/2″ x 8 1/2″  3 3/4″ x 5″ 3″ x 3″
  • Lemon Lolly 5 1/2″ x 4 1/4″

Designer Series Paper:

  • Fresh as a Daisy 5 1/4″ x 4″

Embellishments:

  • Dimensionals

Tools:

  • Stylish shapes (Largest Circle)
  • Cut And Embossing Machine – 149653

Basic Tools:

  • Trimmer -152392
  • Multipurpose Liquid Glue – 110755

Please, Leave A Comment

Pamela Sadler Signature

Card Fold Journey


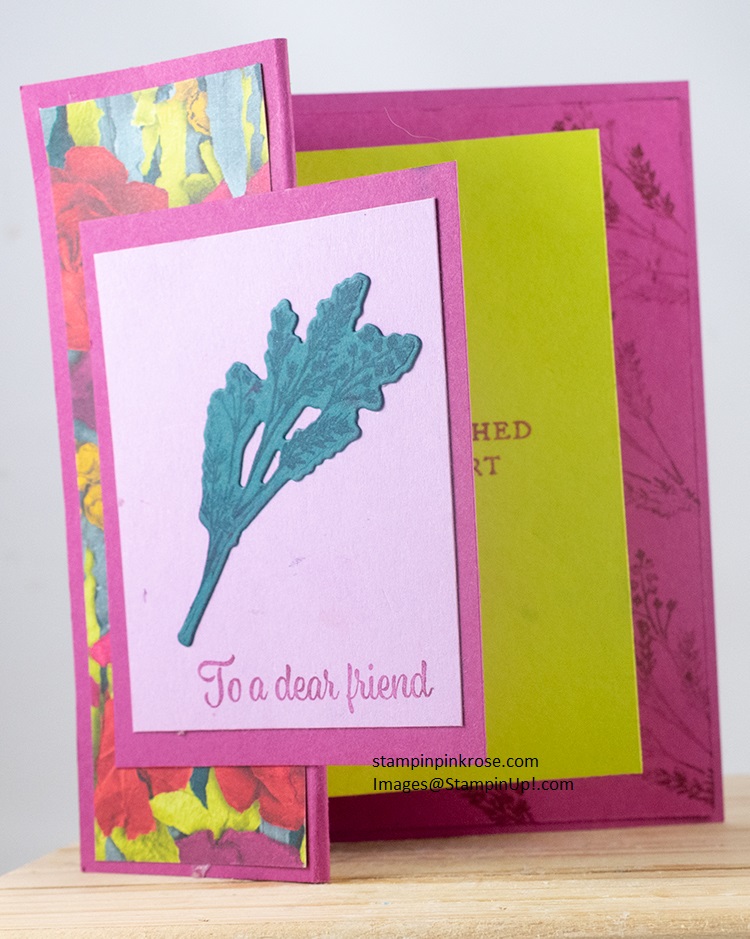
It is time to take a card fold trip with beautiful Designer Series Paper. This creation will work with any image stamp set and occasion. It has multiple folds and a hidden little box you make.  That box is what makes the Lemon-Lime Twist cardstock stand out.
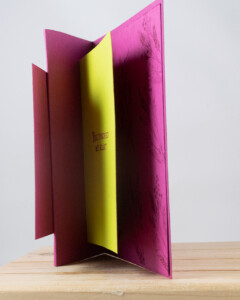
I needed a card for a friend who is so giving.  I used the Plentiful Plants stamp set which is now retired. Again remember you find the greeting that fits your message.

Note: The step-by-step instructions are at the bottom of this card information.

Spotlight on a Stamp

Color Combination:

  • Berry Burst
  • Fresh Freesia
  • Lemon-Lime Twist
  • Pretty Peacock

Stamp Set:

  • Nature’s Prints

Ink:  

  • Berry Burst
  • Memento Black

Paper: Remember I always use Basic White as my base.

  • Berry Burst 5 1/2″ x 8 1/2″, 4 x 5 1/4″,  3″ x 3 1/4″
  • Fresh Freesia 2 3/4″ x 3″
  • Lemon-Lime 3″ x 4 1/2″, 3″ x 2 1/4″

Designer Series Paper:

  • Masterfully Minded 1 3/4″ x 5 1/4″

Basic Tools:

  • Cut and Emboss Machine*

Accessories:

  • Trimmer
  • Multipurpose Glue

*This will depend on whether you use a die or a punch.

Quick Links

DBWS    http://www.stampinup.net/esuite/home/pinkrose/events

Store  https://www.stampinup.com?demoid=2139595

Free Catalog https://stampinpinkrose.com/catalog-re

Join my team https://www.stampinup.com/join?demoid=2139595

Questions http://pamela@stampinpinkrose.com

Pinterest https://www.pinterest.com/stampinpinkrose

Youtube https://www.youtube.com/channel/UCiKnvPZ8Le3aWHzHslRWw0g/videos?

Facebook  https://www.facebook.com/stampinpinkrose/

Instagram  https://www.instagram.com/stampin_pink_rose/?hl=en

Etsy https://www.etsy.com/shop/CardsTrulyfromthHear

Need a card: www.cardstrulyfromtheheart.com


Steps for this card:

  1. Fold the Berry Burst at 4 1/4″
  2. Fold the left side back at 2 1/8″.
  3. Adhere the DSP strip to the folded back part.
  4. Stamp image all over the 4″ x 5 1/4″ with Berry Burst CS.  Then adhere to the card.
  5. With the smaller Lemon-Lime Twist CS score at 3/4″, 1 1/2″, and 2 1/4″.  This is the one you fold to make a box. To adhere it together use the tear and tape if you have it. Adhere it has close to the fold without being on it.
  6. Adhere one folded section to the Berry Burst that has the stamped images.
  7. Stamp your inside words on the larger piece of Lemon-Lime CS.
  8. Adhere the larger Lemon-Lime Twist CS onto the top of the box.
  9. Assemble the Berry Burst and Fresh Freesia with your image. Then adhere only on the left side.

Please, Leave A Comment

Pamela Sadler Signature

Enjoying the Moment

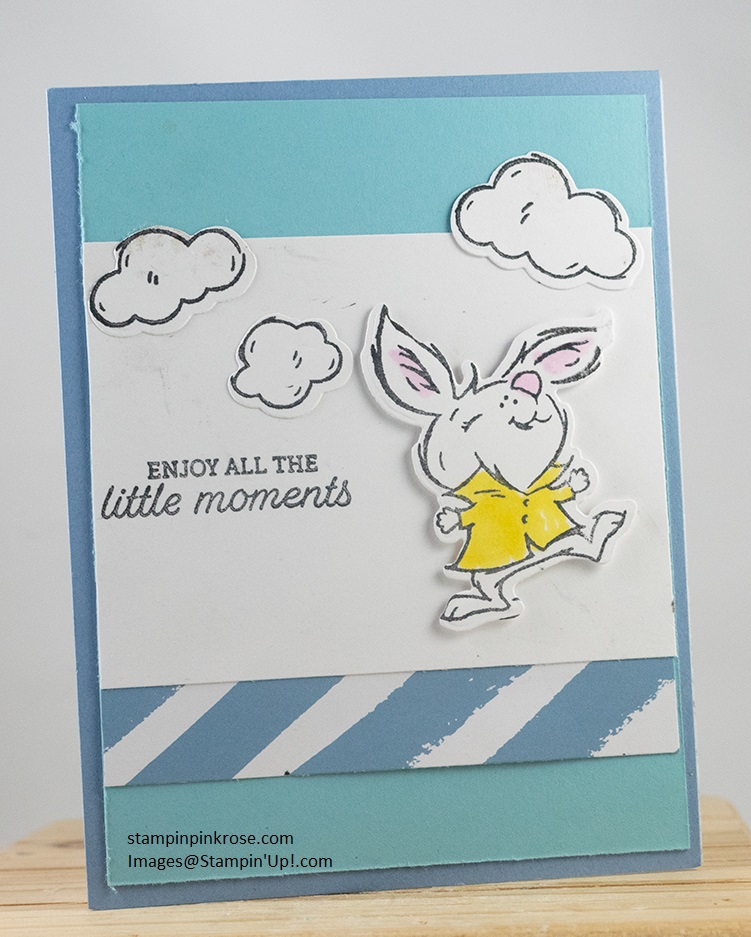
As I prepare for the Holidays I think of all the moments we will enjoy as a family.  They are all growing up too quickly. This is particularly true with the youngest ones. I can’t believe Abby is three and Noah will be 5 in March.  We need to treasure these moments.

As I viewed the different Stampin’ Up! stamp sets, this verse in Easter Bunny hit a cord.  Maybe someone out there is clever enough to use these words to create a Christmas card. For now, the rabbit will need to do the job.

Stamp:

  • Playing in the Rain
  • Easter Bunny (words)

Ink:

  • Memento Black

Blends:

  • Lemonade Lolly
  • Bubble Bath (pink)

Paper:

  • Basic White 5 1/2″ x 8 1/2″ 3″ x 4″ 3″ x 3″ 2″ x 2″
  • Balmy Blue 5″ x 4″
  • Boho Blue 5 1/2″ x 4 1/4″

Designer Series Paper:

  • 2023 – 2025 In Color 1 1/2″ x 4″

Embellishments:

  • Dimensional

Tools:

Playing in the Rain Dies

Basic Tools:

  • Trimmer -152392
  • Cut And Embossing Machine – 149653
  • Multipurpose Liquid Glue – 110755

Instructions:

  1. Fold Basic White to 4 1/4″.
  2. Adhere the Boho Blue CS to the front of the card.
  3. Adhere the Balmy Blue CS to the center of the card. (On top of Boho Blue)
  4. Adhere the DSP to the White CS at the bottom of the card. (See photo) You will see about 1 1/2″.
  5. Stamp the words Enjoy All The Little Moments to the bottom left side of the Basic White CS.
  6. Adhere to the center of the card.
  7. Stamp the clouds in Memento Black on Basic White (You will need all 3)
  8. Run the clouds you just stamped on through the Cut And Emboss Machine using the Playing In the Rain Dies. (set aside)
  9. Stamp the Bunny in Memento Black on Basic White.
  10. Run Bunny through the Cute And Emboss Machine using the Playing In The Rain Dies.
  11. Color the Jacket in Lemonade Lolly Blend.
  12. Color the ears and nose in the Bubble Bath with the Blends.
  13. Adhere a dimensional to the back of the Bunny.
  14. Adhere to the right side of the words. (see photo)
  15. Adhere the clouds over the words and Bunny. (see photo)

CS = Card Stock

DSP = Designer Series Paper

Please, Leave A Comment
Pamela Sadler Signature