Weekly Newsletter Feb 20th

Here is our first Weekly Newsletter on my blog site.  Remember this will be coming every Tuesday as opposed to my emails going out automatically. It will be a similar format with an idea to apply for the week.

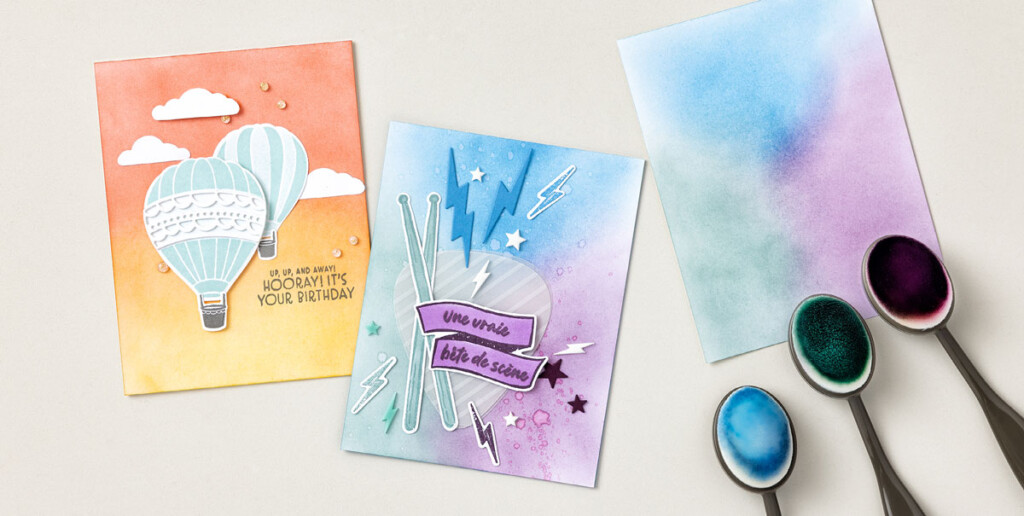
Notice we are using the Stampin’ Up! Blend Brushes. I just love the these brushes!


When time and inspiration are short, a simple CASEing (Copy and Share Everything) session can be a paper crafter’s best friend. Why not CASE the super-cute technique featured in this project?This week, our CASEing technique is creating a multicolored background using Blending Brushes. For our Up, Up, and Away card, we blended Calypso Coral and Crushed Curry. To make the background for our new card, we blended Azure Afternoon, Blackberry Bliss, and Lost Lagoon onto Basic White Cardstock using Blending Brushes. Then we splattered water using a Water Painter.Beautiful! Use this technique to make a stack of showstopper cards today—or put it in your file and stash it away for a rainy day!

Weekly Schedule

Mon.  Feb. 19th    Post

Tues. Feb.  20th Weekly Newsletter

Thurs. Feb 22nd  Post

Fri.  Feb. 23rd  Newsletter Project
Please, Leave A Comment

Pamela Sadler Signature

A Little Gardening Thoughts

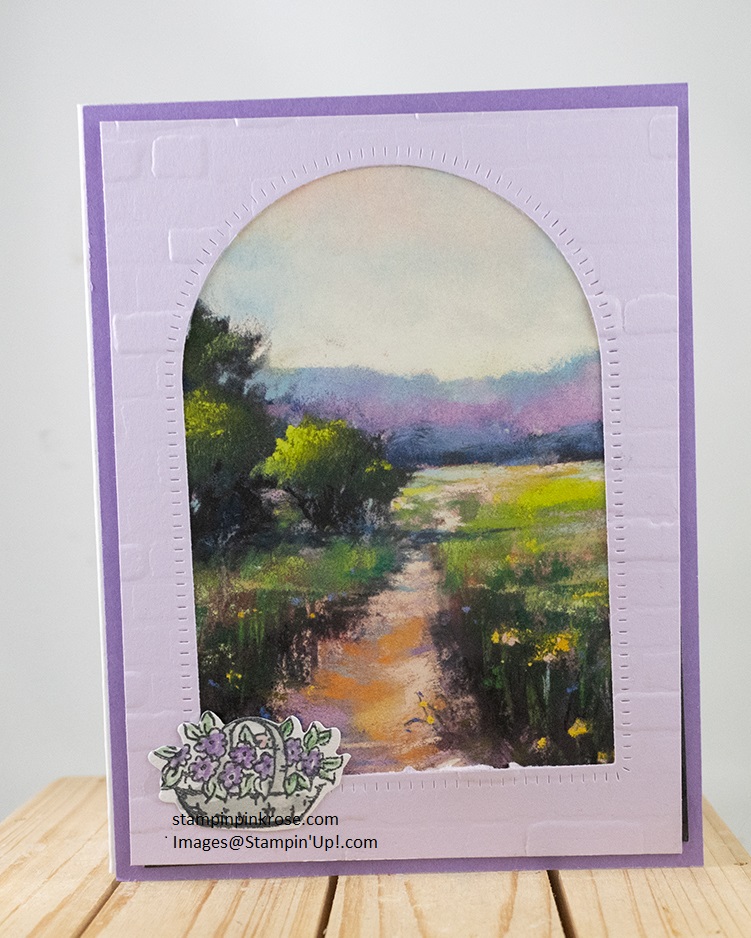
I know it is not Spring yet. We received a reminder of that on Friday with 4.2 inches of snow.  It is melting fairly quickly and Spring-like temperatures are in the forecast. I will take all the warm temperatures we can get.  So I thought let us do something different like Garden Meadow.  I don’t think I need to remind you how beautiful Stampin’ Up! Designer Series is.

Meandering Meadows DSP  is so beautiful to make that garden scene seem real.  Then frame it with the arch die in the bundle. You will almost feel like you could walk through it.  To give more detail use the Brick and Mortar Embossing Folder on the Fresh Freesia cardstock.  Add a little basket with some simple coloring and you are done.

Just think of the occasions you can use this card. Birthday, Thinking of You, Thank You and Get Well.  Plus, just write a special note inside.

Spotlight on a Stamp

Color Combination:

  • Fresh Freesia
  • Highland Heather
  • Granny Apple Green
  • Gray Granite

Stamp Set:

Ink:  

  • Memento Black

Blends:

  • Highland Heather
  • Apple Green’
  • Gray Granite

Paper: Remember I always use Basic White as my base.

  • Basic White 5 1/2″ x 8 1/2″, 2″ x 2″ approx.
  • Highland Heather  4 1/4″ x 5 1/2″
  • Fresh Freesia 4″ x 5 1/4″

Designer Series Paper:

  • Meandering Meadow 4″ x 5 1/4″  (do just under these measurements.

Tools:

  • Cut and Emboss Machine

Accessories:

  • Trimmer
  • Multipurpose Glue


Quick Links:

DBWS    http://www.stampinup.net/esuite/home/pinkrose/events

Store  https://www.stampinup.com?demoid=2139595

Free Catalog https://stampinpinkrose.com/catalog-re

Join my team https://www.stampinup.com/join?demoid=2139595

Questions http://pamela@stampinpinkrose.com

Pinterest https://www.pinterest.com/stampinpinkrose

Youtube https://www.youtube.com/channel/UCiKnvPZ8Le3aWHzHslRWw0g/videos?

Facebook  https://www.facebook.com/stampinpinkrose/

Instagram  https://www.instagram.com/stampin_pink_rose/?hl=en

Etsy https://www.etsy.com/shop/CardsTrulyfromthHear

Need a card: www.cardstrulyfromtheheart.com

Please, Leave A Comment

Pamela Sadler Signature

Newsletter Project Feb. 16th

Did you notice the title?  I am moving the Newsletter Project to my blog site.  It will be here officially on Feb. 27th.  You will no longer receive an email with it. So I am trying to get you in the habit of receiving it here. The title will look like this with a different date. I hope you enjoy the change.

Stamp:

  • From the Herd – words (retired)

Ink:

  • Memento Black

Paper:

  • Basic White 5 1/2″ x 8 1/2″ 1 1/2″ x 2″(x3)
  • Lost Lagoon 5 1/2″ x 4 1/4″ 5 1/2″ x 2 1/4″ 1″ x 2″

Designer Series Paper:

  • Trusty Tools 4 1/4″ x 2″

Tools:

  • Perennial Postage
  • Trusty Tool Dies
  • Cut and Emboss Machine

Accessories:

  • Trimmer -152392
  • Multipurpose Liquid Glue – 110755

Instructions:

  1. Fold Basic White at 4 1/4″.
  2. Adhere the Lost Lagoon to the front of the card.
  3. Adhere the DSP to the center of the card.
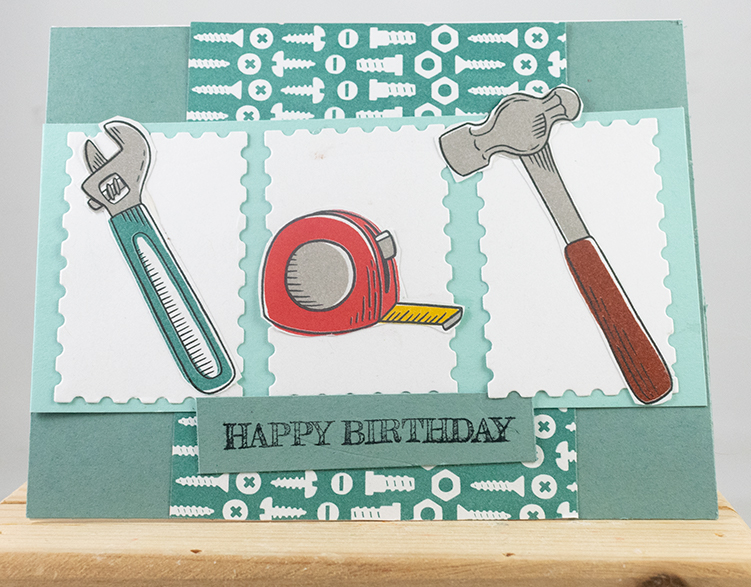
  4. Adhere the Lost Lagoon to the center of the card. (see photo)
  5. Cut the postage through the Cut And Emboss Machine. (x3)
  6. Adhere each postage in the center of the card. (see photo)
  7. Cut out the wrench, measuring tape, and hammer through the Cut And Emboss Machine using the Trusty Tool Dies.
  8. Adhere the Wrench to the left side of the card, the Measuring Tape in the center, and the Hammer on the right side of the card.
  9. Stamp the words” Happy Birthday” on a Lost Lagoon with the Memento Black Ink.
  10. Adhere to the bottom of the card. (see photo)

CS = Card Stock

DSP = Designer Series Paper

Please, Leave A Comment

Pamela Sadler Signature