Time to Create Something Different

If you are a scrapbooker you will love this project.  If you are like me and not like long-winded projects this may be just what you need.


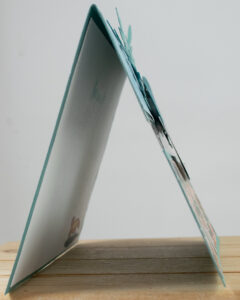
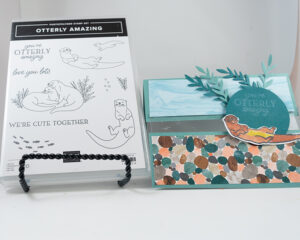
Have you ever made an album with an envelope? All you need is notecard-sized envelopes, patterned paper, and a touch of creativity!

To build the album, fold the envelope flap back to give the crease a bit more flexibility, and slip it into the opening of another envelope, facing down. Use adhesive to adhere the flap more securely (we used Stampin’ SEAL+). You can fancy it up by attaching patterned paper to cover the envelope pocket. Repeat these steps with as many envelopes as you wish (we did five!). You can then decorate the inside layout to reflect the memories you would like to keep.

Once you are finished adding envelopes, wrap the flap from the first album around all envelopes smoothly and adhere to last envelope on the outside. This can be covered up with patterned paper to hide the flap.

Please, Leave A Comment

Pamela Sadler Signature

Doing Circles

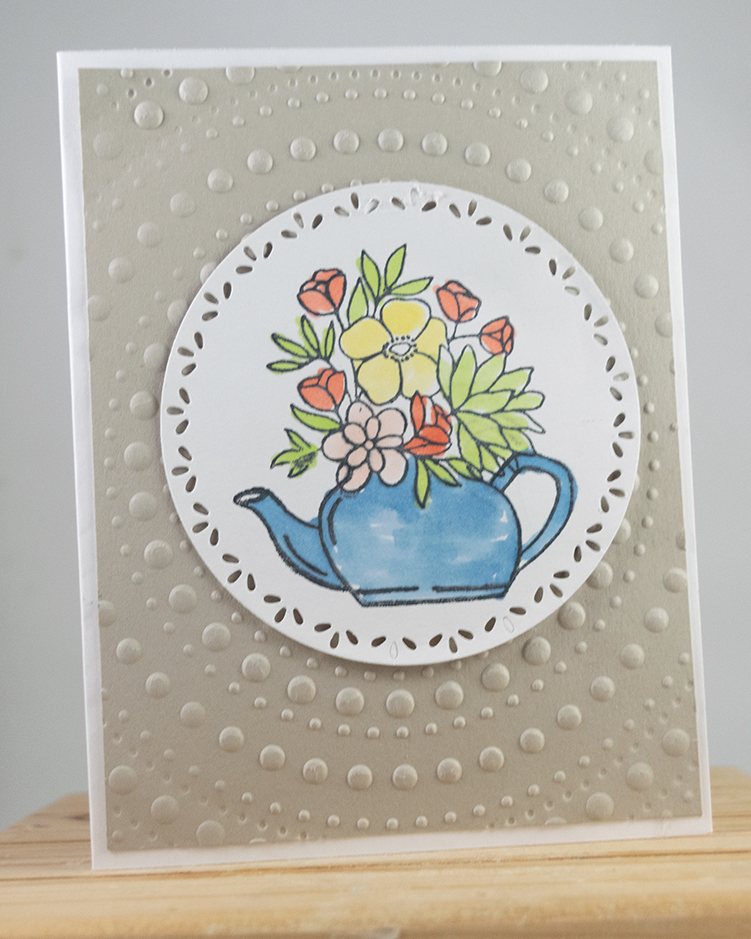
Do you know how to make a card with circles?  Grab the Spotlight on Nature stamp set bundle and let the dies do the work. Then add some of the words from the Unbounded Love stamp set.  This means this card will work for different occasions.

Spotlight on a Stamp

Color Combination:

  • Basic White
  • Boho Blue

Stamp Set:

  • Spotlight on Nature Bundle Order Here
  • Unbounded Love

Ink:  

  • Memento Black

Paper: Remember I always use Basic White as my base.

  • Basic White 5 1/2″ x 4 1/4″, 4″ x 4″, 2″ x 2″
  • Boho Blue 5 1/2  x 4 1/4″”

Designer Series Paper:

  • Subtles 3 3/4″ x 5″, 3″ x 3″

Embellishment:  What embellishment do you like to use?

  • Rhinestones

Tools:

  • Cut and Emboss Machine
  • Spotlight on Nature Dies in Bundle

Accessories:

  • Trimmer
  • Multipurpose Glue


Quick Links

DBWS    http://www.stampinup.net/esuite/home/pinkrose/events

Store  https://www.stampinup.com?demoid=2139595

Free Catalog https://stampinpinkrose.com/catalog-re

Join my team https://www.stampinup.com/join?demoid=2139595

Questions http://pamela@stampinpinkrose.com

Pinterest https://www.pinterest.com/stampinpinkrose

Youtube https://www.youtube.com/channel/UCiKnvPZ8Le3aWHzHslRWw0g/videos?

Facebook  https://www.facebook.com/stampinpinkrose/

Instagram  https://www.instagram.com/stampin_pink_rose/?hl=en

Etsy https://www.etsy.com/shop/CardsTrulyfromthHear

Need a card: www.cardstrulyfromtheheart.com


Please, Leave A Comment

Pamela Sadler Signature

No More Weekly Project

This is the last of the Halloween cards.  I hope you have enjoyed them. I think this stamp set is one of best Halloween stamp sets with dies.  I will be not posting a Weekly Project next Friday.  I will be back the next week.

Stamp:

  • Potions and Spells Bundle

Ink:

  • Memento Black

Blends:

  • Daffodil Delight
  • Pumpkin Pie
  • Light Black
  • Smoky Slate

Paper:

  • Basic White 5 1/2″ x 8 1/2″,  3″ x 3″ , 2″ x 2″ , 2″ x 2″
  • Pumpkin Pie 5 1/2″ x 4 1/4″,  2 1/4″ x 5 3/4″
  • Basic Black 5 1/4″ x 4″

Tools:

  • Bricks Embossing Folder
  • Potions and Spells Bundle Dies
  • Spotlight on Nature Dies

Basic Tools:

  • Trimmer -152392
  • Cut And Embossing Machine – 149653
  • Multipurpose Liquid Glue – 110755

Instructions:

  1. Fold Basic White CS at 4 1/4″.
  2. Adhere the Pumpkin Pie CS to the front of the card.
  3. Run Basic Black through the Cut And Emboss Machine using the Bricks Embossing Folder.
  4. Adhere to the center of the card.
  5. Run Pumpkin Pie through the Cut And Emboss Machine using the Bricks Embossing Folder.
  6. Adhere to the bottom of the card. (see photo)
  7. Cut a circle from Spotlight on Nature Dies in Basic White.
  8. Stamp the words “A Little Hocus Pocus” in Memento Black on Baisc White CS.
  9. Adhere to the center of the card.
  10. Stamp the crow and the books in Memento Black.
  11. Color the crow’s body in Light Black, the beak and feet in Pumpkin Pie.
  12. Color the top book in Daffodil Delight, the bottom in Pumpkin Pie, and the middle of the book in Smoky Slate.
  13. Run the crow through the Cut And Emboss Machine using the Potions And Spells Bundle Die. (set aside)
  14. Run the books through the Cut And Emboss Machine using the Potions And Spells Bundle Die.
  15. Adhere the Book of Spells to the center of the card. (see photo)
  16. Adhere the Crow to the top of the Books in the center of the card. (see photo)

CS = Card Stock

DSP = Designer Series Paper

Please, Leave A Comment

Pamela Sadler Signature