July Project Newsletter 3


Stamp:

  • Country Birdhouse Bundle

Ink:

  • Memento Black

Blends:

  • Crumb Cake

Paper:

  • Basic White 5 1/2″ x 8 1/2″ 1 1/2″ x 1 1/2″
  • Crumb Cake 5 1/2″ x 4 1/4″ 3″ x 3″
  • Summer Splash 3″ x 3″
  • Basic Black 1″ x 1″

Designer Series Paper:

  • Country Woods

Embellishments:

  • Dimensionals

Tools:

  • Layering Circle Dies

Basic Tools:

  • Trimmer -152392
  • Cut And Embossing Machine – 149653
  • Multipurpose Liquid Glue – 110755

Instructions:

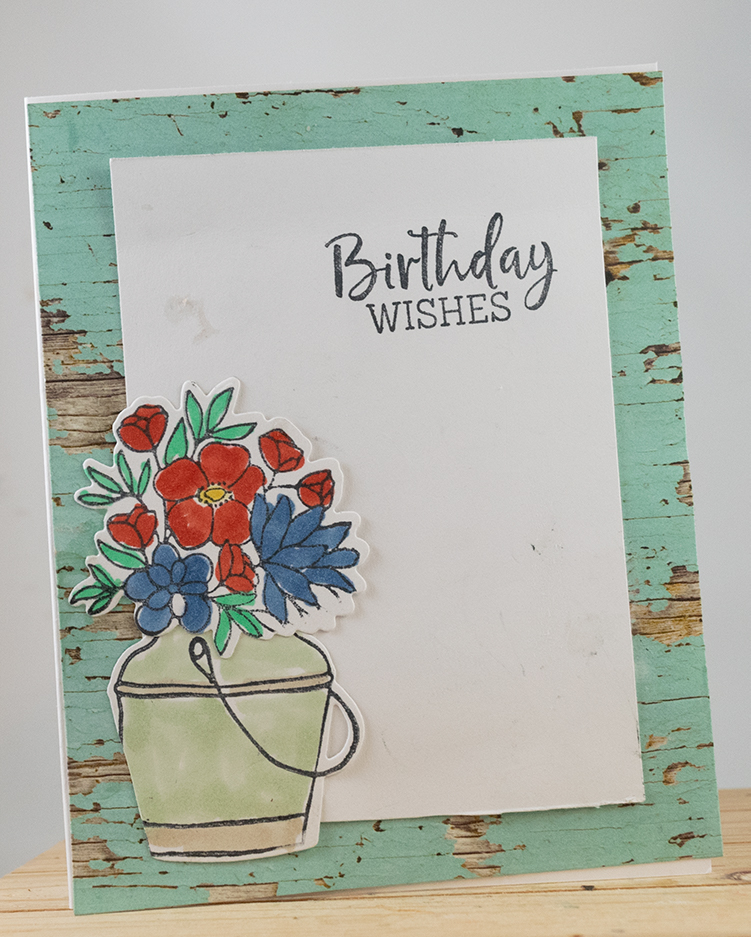
  1. Fold Basic White CS to 4 1/4″.
  2. Adhere Crumb Cake to the front of the card.
  3. Adhere the DSP to the center of the card.
  4. Run DSP through the Cut And Emboss Machine using the Country Birdhouse Bundle.
  5. Run the birdhouse through the Cut And emboss Machine again but use Layering Circle Dies for the middle. (set aside)
  6. Run Crumb Cake through the Cut and Emboss Machine using the Country Birdhouse Bundle. (see photo, set aside)
  7. Run Summer Slash through the Cut and Emboss Machine using the Country Birdhouse Bundle. (see photo)
  8. Adhere the Basic Black to the back of the Birdhouse.
  9. Adhere to the Crumb Cake that you ran through to the top of the birdhouse.
  10. Adhere the Summer Splash to the bottom of the crumb cake. (see photo)
  11. Stamp the words “Happy Birthday” to the bottom of the birdhouse.
  12. Adhere to the center of the card.
  13. Run the Basic White CS through the Cut and Emboss Machine using the Country Birdhouse Bundle bird.
  14. Color the wings of the bird in Crumb Cake
  15. Adhere the Dimensional to the back of the bird.
  16. Adhere to the left side of the birdhouse.

CS = Card Stock

DSP = Designer Series Paper

Please, Leave A Comment

Pamela Sadler Signature

New Favorite

Right now I have a new favorite stamp set.  That doesn’t mean I won’t have a new favorite tomorrow, but I will show you another idea with this stamp set on Monday.  Do your favorites change constantly?  Getting in the craft room and seeing what I can create is so much fun.  It can brighten a day.

May I introduce the Charming Duck Pond stamp set?  I used the dies and Lily Pond Lane Designer Series Paper.  Plus I dug out the Brushed Brass Butterflies Embellishments. I think it added just the right touch to this card.

Spotlight on a Stamp

Color Combination:

  • Peach Pie
  • Petal Pink
  • Pretty Peacock
  • Granny Apple Green
  • Early Espresso

Stamp Set:

Ink:  

  • Memento Black

Paper: Remember I always use Basic White as my base.

  • Basic White 5 1/2″ x 8 1/4″
  • Peach Pie 1″ 1″
  • Petal Pink 1″ x 1″ approx.
  • Pretty Peacock  4″ x 5 1/4″, 3 1/2″ x 2″
  • Granny Apple Green 2″ x 2″
  • Early Espresso 1″ x 1″

Designer Series Paper:

  • Lily Pond Lane 3 `/4″ x 1 3/4″, 5″ x 3 3/4″

Embellishment:  What embellishment do you like to use?

  • Brushed Brass Butterflies Embellishment

Tools:

  • Cut and Emboss Machine
  • Charming Duck Pond Dies (part of the bundle)

Accessories:

  • Trimmer


Quick Links

DBWS    http://www.stampinup.net/esuite/home/pinkrose/events

Store  https://www.stampinup.com?demoid=2139595

Free Catalog https://stampinpinkrose.com/catalog-re

Join my team https://www.stampinup.com/join?demoid=2139595

Questions http://pamela@stampinpinkrose.com

Pinterest https://www.pinterest.com/stampinpinkrose

Youtube https://www.youtube.com/channel/UCiKnvPZ8Le3aWHzHslRWw0g/videos?

Facebook  https://www.facebook.com/stampinpinkrose/

Instagram  https://www.instagram.com/stampin_pink_rose/?hl=en

Etsy https://www.etsy.com/shop/CardsTrulyfromthHear

Need a card: www.cardstrulyfromtheheart.com


Please, Leave A Comment

Pamela Sadler Signature

Weekly Newsletter – week of July 15th

I hope you liked yesterday’s post.  I am slowly getting back on track. Don’t forget the Bonus Days will end July 31st and I know you want those $5 coupons to use in August.  You will earn those coupons with every $50 you spend.  What a nice way to enjoy Fall projects like the one I have today.

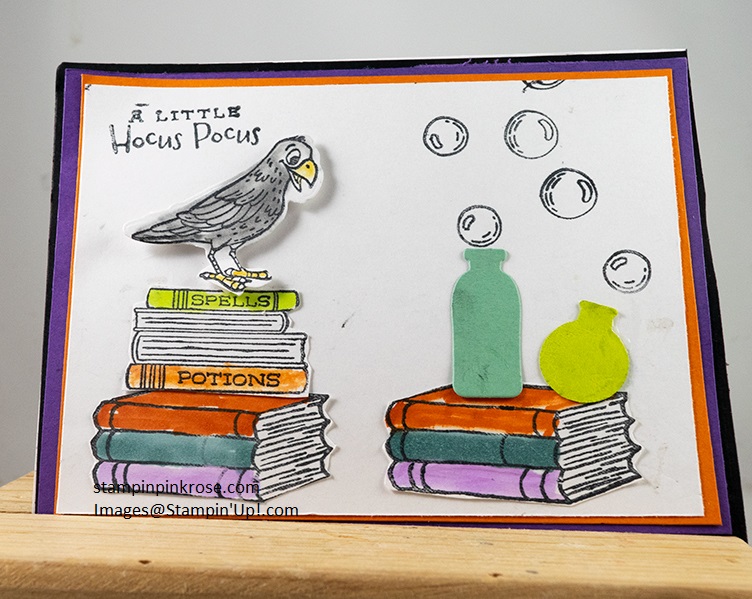
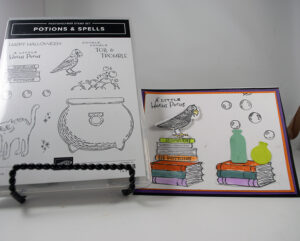
Here is an  Online Exclusives. This is on my must-have list. It has the dies which we all love. There are so many ways you can do it with the Potions & Spells Bundle that you’ll love no matter how you do it!

For a simple card, just stamp the cauldron image onto a cardstock base, and die-cut the cat (don’t forget to color in the eyes with the Lemon Lime Twist Stampin’ Blends!). Create a banner for your sentiment and pop it up with some Stampin’ Dimensionals, and you are ready to go!

But let’s say you want your creativity to go beyond card making. How about a treat bag? Die cut the bubbles and cat on Basic White Cardstock, and use a Blending Brush to color them in. To create the bag, measure Pecan Pie Cardstock to 5-1/4″ x 8″ (12.3 x 20.3 cm). On the long side, score 1-1/4″ (3.2 cm), 3-3/4″ (9.5 cm), 5″ (12.7 cm), and 7-1/2″ (19 cm). On the short side, score to 1-1/4″ (3.2 cm) to make the bag. Make the handle with Basic Black Cardstock to measure 3/4″ x 8″ (1.9 x 20.3 cm).

But you can go even further and create Halloween decor. That’s right, we said it: DECOR. Start with 6″ x 11″ (15.2 x 28 cm) cardstock, and score the long side at 3″ (7.6 cm) and 8″ (20.3 cm), then die cut the cat, the broom, the bubbles, and the cauldron (notice how our cauldron has the Distressed Tile 3D embossing print on it?). Set the Full of Life Designer Series Paper as the backdrop and create a peek-through effect with the Delicate Forest Dies. If you want to bring it to life even more, build up the inside scene with foam sheets.


Remember to keep checking the Online Exclusives.  Order Here

Please, Leave A Comment

Pamela Sadler Signature