Well, we are definitely winding down Sale-a-bration. There are just a few days left. It’s time to double-check and see what you are missing, or maybe you need more Designer Series Paper.
Today is Technique Tuesday
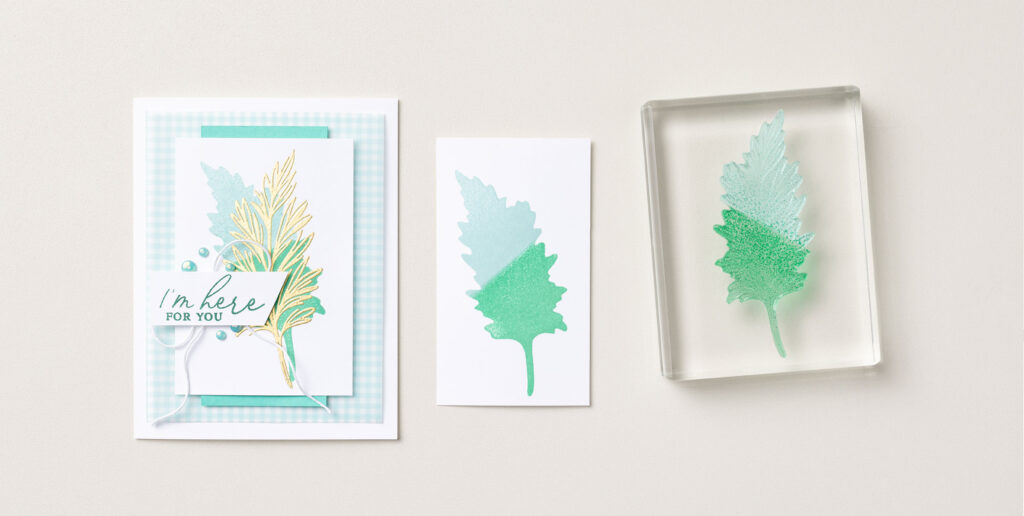
Ever tried inking an image by splitting the color right down the middle? If not, we may have a new, go-to technique for you. It’s both eye-catching and easy to do!
Simply press the bottom half of a stamp on an ink pad, then press the top half on a different, complementary color. (We love photopolymer stamps and clear blocks for this technique; they make it easy for you to see what you’re doing!)
You can then do as we did and stamp on the two-tone silhouette with VersaMark; finally, emboss the image with gold Wow! Embossing Powder. We think the beautiful, green-blue tones (Shy Shamrock and Pool Party) create the perfect backdrop for the gold-embossed leaf.
Please, Leave A Comment